PCI on SPARC

what cards are in my box?

# ipmitool sunoem cli "show -level all -output table /system/pci_devices/add-on description"
Connected. Use ^D to exit.
-> show -level all -output table /system/pci_devices/add-on description
Target             | Property              | Value
-------------------+-----------------------+-----------------------------------
/System/           | description           | Sun Dual Port 10 GbE PCIe 2.0 Low
 PCI_Devices/Add-  |                       | Profile Adapter, Base-T
 on/Device_3       |                       |
/System/           | description           | Oracle Storage 12 Gb SAS PCIe
 PCI_Devices/Add-  |                       | RAID HBA, Internal
 on/Device_4       |                       |


forcing solaris to look for chances

echo '#path_to_inst_bootstrap_1' > /etc/devices/path_to_inst Run: bootadm update-archive shutdown the computer change the PCIe card, for example a NIC with an HBA poweron again...

It is tempting here to manually modify /etc/devices/path_to_inst directly, replacing 8 and 9 with 10 and 11. But modification of path_to_inst file does not survive an upgrade. Any modification done to that file will be dropped after an upgrade. So bootstrapping path_to_inst file is the right persistent way. => Bootstrapping this file allows the box to force a rebuild of path_to_inst.
Oracle Soft- vs. Hard- Partitioning

Partitioning; like mentioned in the “Oracle Partitioning Policy”, when a server is separated into individual sections:
Soft partitioning examples
VMware, HyperV, RHEV, KVM, Xen

Hard partitioning examples
Solaris Zones, SPARC LDOM, IBM LPAR, Fujitsu PPAR, OracleVM for x86

When hard partitioning is in place you need to license only bound CPU cores. Live Migration between to hosts will never be covered and will need to license all cores. (Except Oracle’s Trusted Partitions in Exalogic, Exalytics, Exadata and PCA). Otherwise you will need to license all cores in a VM cluster with Soft Partitioning.

Special Cases in VMware

VMware >5.0
In earlier VMware releases running VMs could be moved within one cluster, therefor you needed to license all cores within this VMware cluster.
Customers built their own Oracle Cluster in their VMware farm…

VMware 5.1 – 5.5
With this version a VM could be moved across cluster boundaries in a vCenter. So you had to license all servers and cores within a vCenter.
Customers built their own Oracle vCenter installation.

VMware 6.0<
There is no longer need to have a shared storage and you could migrate VMs across vCenter instances. That requires you to license all physical servers running VMware in your company.  🙂
There are rumours saying that some customers had a special agreement with Oracle to use VMware with a special setup, separated and not routed VLANs, SAN zoning and so on… but you will have to get in touch with Oracle to create your own special customer definition which might certify your setup but I am sure that this will only be allowed exactly for the version you are running now.

What I would recommend my customers; take a look at Oracle on Oracle solutions and use a seperate VM software like OracleVM next to your VMware.

BTW; OVM is “for free”, you only need to pay for support. If you would use Oracle hardware, the support comes with the hardware support contract.

Please keep in mind that there are special setups for hard partitioning you will have to follow to be on the safe side…

Oracle Storage Cloud Software Appliance Installation

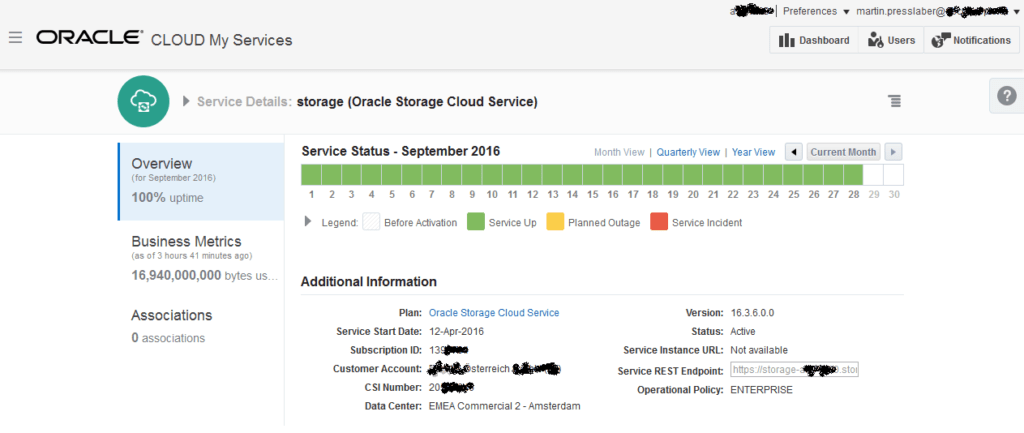
Just playing around with Oracle Storage Cloud and tried to install the appliance which enabled access to the cloud storage per NFS (otherwise you would have to use APIs).

Prerequisites:

    Oracle Linux 7 with UEK Release 4 or later
    Docker 1.8.3 or later
    NFS version 4.0 or later

And yes, for sure an active Oracle Storage Cloud subscription
oracould

Ok, installed an Oracle VM and gave it a try:

[root@OL7mpress01 ~]# uname -a
Linux OL7mpress01 4.1.12-61.1.6.el7uek.x86_64 #2 SMP Thu Aug 18 21:55:17 PDT 2016 x86_64 x86_64 x86_64 GNU/Linux
[root@OL7mpress01 ~]# yum install docker-engine-1.8.3-1.0.2.el7.x86_64
Loaded plugins: langpacks, rhnplugin, ulninfo
This system is receiving updates from ULN.
[...]

Installed:
  docker-engine.x86_64 0:1.8.3-1.0.2.el7

Dependency Installed:
  audit-libs-python.x86_64 0:2.4.1-5.el7         checkpolicy.x86_64 0:2.1.12-6.el7                     docker-engine-selinux.noarch 0:1.12.0-1.0.2.el7
  libsemanage-python.x86_64 0:2.1.10-18.el7      policycoreutils-python.x86_64 0:2.2.5-20.0.1.el7      python-IPy.noarch 0:0.75-6.el7
  setools-libs.x86_64 0:3.3.7-46.el7

Complete!
[root@OL7mpress01 ~]#
[root@OL7mpress01 ~]# systemctl reboot
[...]
[root@OL7mpress01 ~]# groupadd docker
[root@OL7mpress01 ~]# useradd docker-test -m
[root@OL7mpress01 ~]# usermod -a -G docker docker-test
[root@OL7mpress01 ~]# passwd docker-test
Changing password for user docker-test.
[root@OL7mpress01 ~]# systemctl start docker
[root@OL7mpress01 ~]# systemctl enable docker
Created symlink from /etc/systemd/system/multi-user.target.wants/docker.service to /usr/lib/systemd/system/docker.service.
[root@OL7mpress01 ~]# yum install nfs-utils
[...]
[root@OL7mpress01 ~]# systemctl start rpcbind
[root@OL7mpress01 ~]# systemctl start nfs-server
[root@OL7mpress01 ~]# systemctl enable rpcbind
[root@OL7mpress01 ~]# systemctl enable nfs-server
Created symlink from /etc/systemd/system/multi-user.target.wants/nfs-server.service to /usr/lib/systemd/system/nfs-server.service.
[root@OL7mpress01 ~]# su - docker-test
[docker-test@OL7mpress01 ~]$ docker info
Containers: 0
Images: 0
Storage Driver: devicemapper
 Pool Name: docker-251:0-551720-pool
 Pool Blocksize: 65.54 kB
 Backing Filesystem: xfs
 Data file: /dev/loop0
 Metadata file: /dev/loop1
 Data Space Used: 1.821 GB
 Data Space Total: 107.4 GB
 Data Space Available: 46.23 GB
 Metadata Space Used: 1.479 MB
 Metadata Space Total: 2.147 GB
 Metadata Space Available: 2.146 GB
 Udev Sync Supported: true
 Deferred Removal Enabled: false
 Data loop file: /var/lib/docker/devicemapper/devicemapper/data
 Metadata loop file: /var/lib/docker/devicemapper/devicemapper/metadata
 Library Version: 1.02.107-RHEL7 (2016-06-09)
Execution Driver: native-0.2
Logging Driver: json-file
Kernel Version: 4.1.12-61.1.6.el7uek.x86_64
Operating System: Oracle Linux Server 7.2
CPUs: 2
Total Memory: 15.42 GiB
Name: OL7mpress01
ID: MROP:4OV3:WKNM:MQ3A:274N:EZ23:2SZQ:JHM5:GMQP:5EHC:BTS6:NMED
[docker-test@OL7mpress01 oscsa-onprem]$ df -h
Filesystem           Size  Used Avail Use% Mounted on
devtmpfs             7.7G     0  7.7G   0% /dev
tmpfs                7.8G     0  7.8G   0% /dev/shm
tmpfs                7.8G   17M  7.7G   1% /run
tmpfs                7.8G     0  7.8G   0% /sys/fs/cgroup
/dev/mapper/ol-root   50G  7.0G   44G  14% /
/dev/xvda1           497M  216M  281M  44% /boot
/dev/mapper/ol-home   42G   33M   42G   1% /home
tmpfs                1.6G     0  1.6G   0% /run/user/0
tmpfs                1.6G     0  1.6G   0% /run/user/1001
[docker-test@OL7mpress01 ~]$ cd oscsa-onprem
[docker-test@OL7mpress01 oscsa-onprem]$ sudo ./oscsa-install.sh  -p http://proxy.serverbla.at:3128 -a
data args: -v /oscsa/cache:/usr/share/oracle/ -v /oscsa/md:/usr/share/oracle/system/ -v /oscsa/logs:/var/log/gateway
*************************************
Imported temporary env vars from docker-test to this install session
*************************************
Checking that docker is installed and using the correct version
Pass found docker version Docker version 1.8.3, build aa9b234

*************************************
Checking host prerequisites
*************************************

Detected linux operating system
Checking kernel version
Pass kernel version 4.1.12-61.1.6.el7uek.x86_64 found
Checking NFS version
Pass found NFS version 4

*************************************
All prerequisites have been met
*************************************


*************************************
Begin install
*************************************

Enter the install location press enter for default (/opt/oscsa_gateway/) :

Installing to destination /opt/oscsa_gateway/
Copied install scripts
Copied OSCSA image
Starting configuration script
Enter the mount location for data cache
/oscsa/cache
Enter the mount location for meta data
/oscsa/md
Enter the mount location for log file information
/oscsa/logs
Enter the docker network mode (host or bridge), Hit  for the default bridge mode.

Enter the host port to use for the Administrative Web Interface. Hit  to use dynamic port mapping

Enter the host port to use for NFS access. Hit  to use dynamic port mapping

Enter the host port to use for the optional HTTP REST service. Hit  to use dynamic port mapping

Writing configuration
Importing image
Please run 'oscsa up' to start the software appliance

*************************************
For additional details, please see (/opt/oscsa_gateway/OSCSA_GATEWAY_README.txt) file
*************************************

[docker-test@OL7mpress01 oscsa-onprem]$ sudo firewall-cmd --state
[sudo] password for docker-test:
running
[docker-test@OL7mpress01 oscsa-onprem]$ sudo firewall-cmd --zone=public --add-port=32774/tcp --permanent
success
[docker-test@OL7mpress01 oscsa-onprem]$ sudo firewall-cmd --zone=public --add-port=32775/tcp --permanent
success
[docker-test@OL7mpress01 oscsa-onprem]$ sudo firewall-cmd --zone=public --add-port=32776/tcp --permanent
success
[docker-test@OL7mpress01 oscsa-onprem]$ sudo firewall-cmd --reload
success
[docker-test@OL7mpress01 oscsa-onprem]$ 
[docker-test@OL7mpress01 oscsa-onprem]$ time ./oscsa up
data args: -v /oscsa/cache:/usr/share/oracle/ -v /oscsa/md:/usr/share/oracle/system/ -v /oscsa/logs:/var/log/gateway
Creating OSCSA Volume
Applying configuration file to container
Starting OSCSA [oscsa_gw:1.0.11]
Setting up config file port with nfs
Setting up config file port with admin
Setting up config file port with rest
Management Console: https://OL7mpress01:32769
If you have already configured an OSCSA FileSystem via the Management Console,
you can access the NFS share using the following port.

NFS Port: 32770

Example: mount -t nfs -o vers=4,port=32770 OL7mpress01:/ /local_mount_point

real    0m19.945s
user    0m0.875s
sys     0m1.063s
[docker-test@OL7mpress01 oscsa-onprem]$

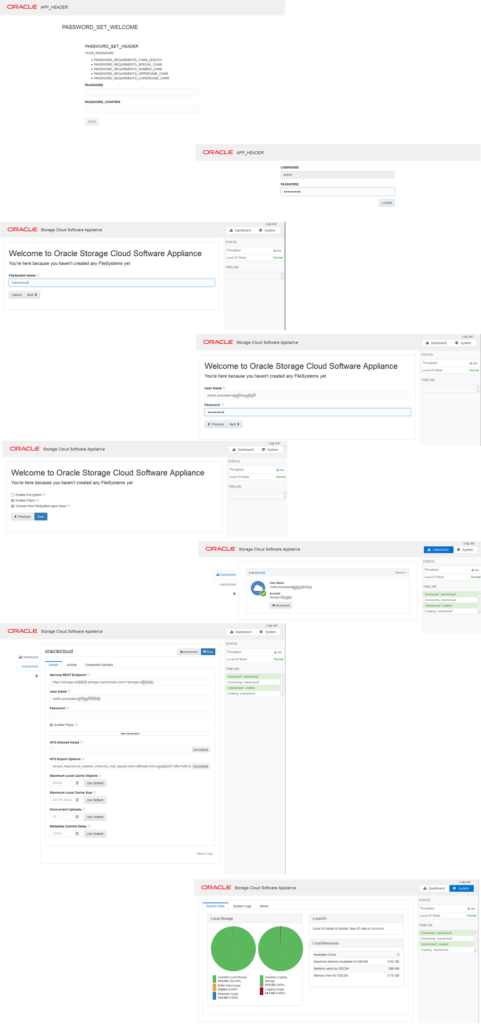
Now I could use a BUI:
ocabuisetup

Now let’s try it with a client:

root@psvsparc1:~ # uname -a
SunOS psvsparc1 5.11 11.3 sun4v sparc SUNW,SPARC-Enterprise-T5120
root@psvsparc1:~ # mkdir /oraclecloud
root@psvsparc1:~ # mount -F nfs -o vers=4,port=32770 10.52.72.82:/oraclecloud /oraclecloud/
root@psvsparc1:~ # df -h  /oraclecloud
Filesystem             Size   Used  Available Capacity  Mounted on
10.52.72.82:/oraclecloud
                       8.0T   4.0T       4.0T    50%    /oraclecloud
root@psvsparc1:~ #
root@psvsparc1:~ # ls -alh /downloads/EIS*iso
-rw-r--r--   1 root     root        7.4G Aug 29 12:28 /downloads/EIS-DVD-ONE-08JUN16.iso
-rw-r--r--   1 root     root        7.6G Aug 29 12:29 /downloads/EIS-DVD-TWO-08JUN16.iso
root@psvsparc1:~# time cp /downloads/EIS-DVD-* /oraclecloud/

real    27m54.958s
user    0m0.032s
sys     6m36.771s
root@psvsparc1:~# 
root@psvsparc1:~# bc
15*1024/28/60
9

So that’s arount 9 MB/s and that’s ok… I am not alone in the company 🙂

root@psvsparc1:~# speedtest-cli
Retrieving speedtest.net configuration...
Retrieving speedtest.net server list...
Testing from next layer (92.60.12.82)...
Selecting best server based on latency...
Hosted by NEXT LAYER GmbH (Vienna) [1.07 km]: 1800000.0 ms
Testing download speed........................................
Download: 563.94 Mbit/s
Testing upload speed..................................................
Upload: 69.71 Mbit/s
root@psvsparc1:~#